Build A Do It Yourself,
Home Made Gold
Dry Washer
.
Build A Do It Yourself,
|
|
||
|
. |
Have you ever wondered if using a dry washer would help you find more gold? Interested in building your own dry washer for gold prospecting and perhaps saving some significant money in the process? If you do it right and plan well you really can save a lot of money and still have a good, functional dry washer that is durable and really holds onto the gold - and that counts for a lot. Here are some thoughts about the essential tools, components and skills that you need to take a look at when planning out the construction of your own home built dry washer...... |
|
|
|
A dry washer separates gold from sand by pulsations of air coming up through a porous cloth medium. It is the gold prospecting equipment of choice in desert areas. The vibrations and flow of air replace the function of water in the normal sluice, allowing the gold nuggets to settle downward. Screened gravel passes down an inclined riffle box with cross riffles. The bottom of the box consists of a thin, light weave canvas or some other fabric through which moving air easily passes upward. There is no question that a dry washers is a piece of gold prospecting equipment that you just have to own if you're working in the desert, but the prices for commercially made units are really high. In addition at least for the bellows type dry washer, they are not that hard to make. It really has only been in the last 40 years that you could buy pre-made dry washers quite easily. For a hundred years before that generally most dry washers were home made affairs designed and built by the individual gold prospector himself. If you'd like to be a part of that great tradition, read on. First, the bulk of what homemade dry washers are made of is wood, so standard home wood working tools are sufficient for all but the riffle tray. I prepared some general plans for an average puffer type homemade dry washer. You can adopt and use these plans, or use them as a starting point and design your own dry washer. To build one, you need to think about how you will build your particular unit, and what design ideas you want to use on your own homemade dry washer. |
||
|
The first design concept you need to think about is the air source. Do you want to build a bellows puffer, or a powered blower type of unit. Both work well, but the puffer type is plainly easier to build. Because of this, I recommend a Puffer type dry washer if this is the first one you are building. Remember that dry washers are such that you could always modify it in the future to switch from a Puffer type to a blower type if that’s what you eventually decide you really want to do. No mater your design, you will need the following construction materials: wood, metal, cloth, screws, screen. I suggest 3/8 inch weave for the material screen – half inch would probably be OK, but I suggest 3/8 inch as best. Too large a size and those larger rocks will help push gold out of your sluice, and if too small and you may loose a nice nugget if you dig one up. You will need standard working tools. See my web page about obtaining the tools you will need. I have done up a page on hand tools for this type of project, you can check it out at: Mining Project Necessary Tools |
 Bellows Type Dry Washer |
|
|
|
||
|
If you go with a blower type of design you will need a blower and motor. A lot of guys who do this and even some commercially made units use the blower off a leaf blower as its easy to get these and they are not too expensive. They are available at a lot of places, just be sure you get one that will meet your needs. I have developed a page to consider and discuss the purchase Mining Equipment component parts and elements. Before you make that buy, check my page out at: Mining Equipment Component Parts My best suggestion if you want to start fabricating mining equipment (and keep the stuff you have in good repair) is to purchase a small welder. Welding is by far the best way to put together a set of riffles for a dry washer. In fact, I so strongly recommend that you consider buying one of these welders that I have done up a whole web page on it. They are also pretty handy for general repairs around the house. If you are seriously considering building your own dry washer, check out my page: Low Cost, Small Arc Welders For Home Use Fabrication of the Homemade Dry
washer: Implementing your plans and designs: You shovel onto the screen until the upper box is full, then with a puffer type, you step to an upwind location and pull the cord to make the bellows puff. The material then works its way down through the hopper, and across the sluice riffles where the gold is caught. When the feed hopper is empty, you start shoveling again until it’s full. Make sure the screen you purchase for the upper box is durable and that on the hopper it is well supported from underneath. If you toss too many big rocks onto a poorly supported screen it will simply bend and break - possibly even crashing down on top of the lower riffle box section and smashing it too. Damage is something that can be fixed, but when you are out in the field, it can be very inconvenient. A couple quarter inch diameter steel rods can be very helpful supports for the screen. |
||
|
The gold catching riffles in the lower box of a dry washer are different than those on a water sluice. The design on a water sluice box is that the gold is retained downstream of the riffle. On a dry washer, the gold is designed to be held on the upstream side of the riffle. The riffle tray is one of the things that really need to be put together by welding. I suppose small bolts would be a possibility, but welding would be much superior. Welding up the removable tray does not take that much work. On the underside of the riffles is a light weave muslin cloth that allows the air to pass upward through it. The riffles need to be a movable tray, so that periodically (usually every hour or two of run time) the riffles and the concentrates can be removed and put in a bucket for later processing. In addition, with the puffer type, dust gets sucked into this lower air box and it needs to be cleaned out from time to time. Check out the welding page noted above for more details. |
 |
|
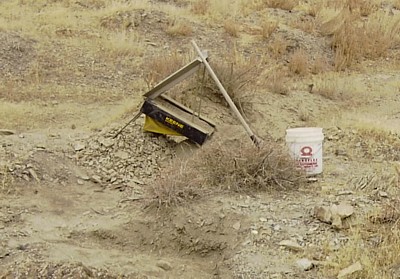
On the underside of the lower box is where the air comes in. If you use a blower, this is where the duct enters. If you are making a puffer / bellows type dry washer, this is where the bellows will go. Good heavy canvas makes a good bellows. Material that has been rubberized or made waterproof is best. You also need a flapper so that air can go in and go out only through the riffles. The one way flow flapper is usually just a piece of 1/8 inch rubber covering a hole about 4 inches in diameter. The bellows are hinged on one side and a pull cord is attached to the end opposite the hinge. Pulling on the cord puffs the air through the riffle cloth. See the photos for further detail. Its helpful if the support legs on the lower blocks are adjustable in some way, as the ground surface in the gold fields is often very uneven. If you would like to look at some additional info on dry washers and the basics of how they operate, take a look at my web page on dry placers and dry washers. OPERATING A DRY WASHER |
||
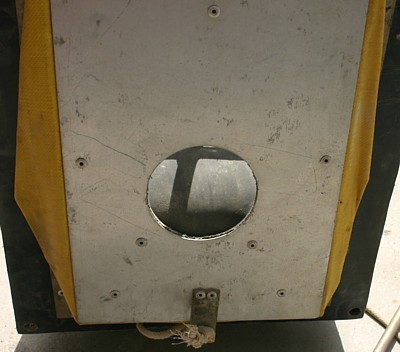 |
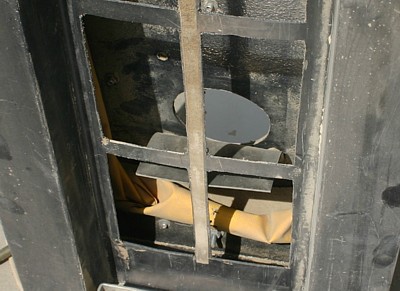 Bellows Air Flap - View from on top (above) Bellows Air Flap- View from on below (at Left) |
|
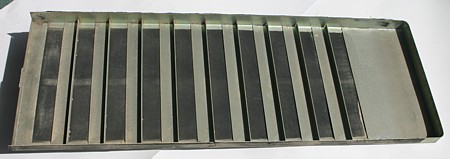 |
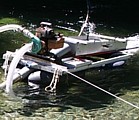
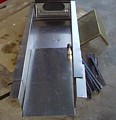
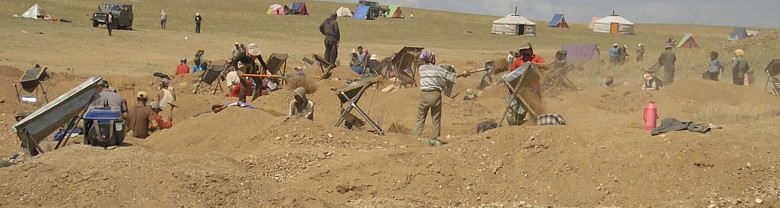
To Left: Dry Washer riffle tray. Material comes down from the upper box onto the metal plate at the top of the tray, then passes down hill over the riffles. The black material is alight cotton muslin cloth, which allows the air to pass through it. This cloth periodically needs to be replaced. Below: Dry Washing in the deserts of Mongolia. |
|
 |
||
Want to know a little bit more about this crazy prospector guy? Well, here's a little bit more about me, and how I got into prospecting: Chris' Prospecting Story

drywash, Gold drywasher, desert gold prospecting, home made gold drywasher, gold drywasher design, gold drywasher plans, building a gold drywasher, gold drywasher riffles, build your own drywasher, wooden dry washer, bellows drywasher, desert gold mining, gold digging

