Assaying
|
Assaying |
|
Interested in testing your ore to assay its gold and silver content? Before you get going too far, take a look at the following information......
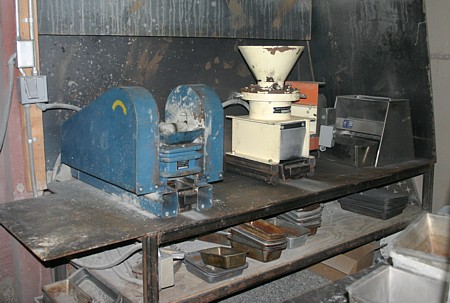
The goal of assaying and testing any potential gold and silver bearing materials is to determine their metals content. While it is sometimes possible to look at a sample and guess its possibilities, more often than not, in order to have an accurate idea of how valuable in ore is it must be analyzed. The results of these tests are usually reported in the form of parts per million or also as ounces per ton. The modern assay office is a true analytical laboratory, with the capacity to analyze many types of materials to determine their metals content. A century ago, the fire assay and a few other methods were the only ones used. Today advanced equipment analyzes a variety of samples not just by fire assay, but by atomic absorption, mass spectroscopy and other specialized techniques. When you are doing anything with hard rock materials, sampling and assaying are the key concepts. Before any material is taken to be assayed, the sample must first be collected. Accurate samples, ones which reflect the true average of the material must be obtained. If the sample does not reflect the average nature of the material, no amount of technical accuracy in processing the sample will provide a correct result. The first step in any assay is sample preparation (I have a separate web page on methods for crushing and pulverizing rock samples and specimens). |
|||
If the sample is wet, it is first dried, then crushed. It is split into a reasonable fraction, and then pulverized to a powder. Splits of the pulverized powder are then set aside for various analysis methods, depending on what analysis is to be done. Only a small part of the actual sample is actually analyzed. Between each sample, the crushing and pulverizing equipment is cleaned off to prevent cross contamination of the samples. |
|
 |
|
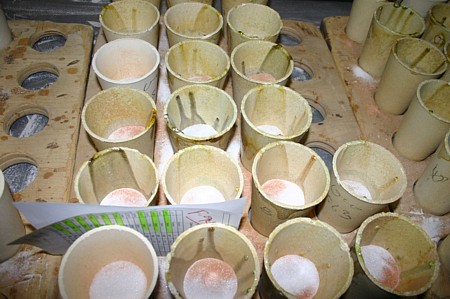
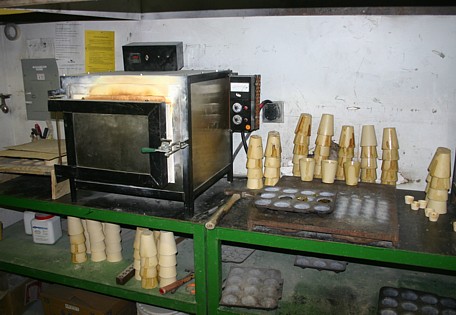
The famous fire assay has been around for more than 500 years, but it still is the best method for determining the quantity of gold in a rock matrix. The fire assay process works by fusing or dissolving the rock sample in a crucible using a lead glass flux. Fluxes of various types are used on various types of ores. Most flux mixes contain sodium bicarbonate, potassium carbonate, borax, litharge (lead oxide) and flour. A typical flux mix might contain five parts sodium bicarbonate for parts potassium carbonate to parts borax one part flour and eight parts litharge. The flour servers to reduce some of the litharge to lead metal. This flux works for most oxidized ores. For ores rich in sulfides, the flour may be omitted and from one to four nails added according to the amount in nature of the sulfides. In this type of flux, the nails serve to reduce the litharge to lead as well as the reduction of the sulfides. The art of selecting the correct flocks for fire assay test is not extremely difficult but it does take some understanding of minerals and their reactions. Once the fluxes selected it is mixed with a known quantity of the pulverized ore sample, and the two are heated in a crucible to a bright red heat (the amount of pulverized sample used is often 29.166 g, or one assay ton). With the reactions are complete, the crucible is removed and the molten glass formed of the flux and ore sample is poured off. The remaining lead metal at the bottom of the crucible is poured into a mold where the lead settles to the bottom and the whole mass cools and solidifies. Once cool, the molds are turned over and the lead buttons removed. This mass of lead metal contains all the gold and silver was present in the sample. The mass of lead metal is then placed on a cupel made of bone ash. This material is such that it readily absorbs lead oxide which has properties like glass, but does not absorb metal. The lead button is placed in the cupel and heated. During this process areas allowed into the furnace in the lead metal is oxidized to lead oxide. The oxide then is either absorbed into the cupel, or volatized off into the atmosphere. What is left is a tiny bead containing all of the gold and silver that was in the original sample. The bead is then weighed, and the total weight of the gold and silver together is known. After this, the gold and silver are parted by flattening to bead and putting it in a solution of dilute nitric acid. Dilute nitric will dissolve the silver but not the gold. The remaining purified gold is then weighed. The weight of the silver in the assay is calculated by subtracting the weight of the gold from the weight of the bead that contained both the gold and the silver. Using the known original weight of sample that was used in the assay, the weight of the gold in the weight of the silver, the content of the ore sample in ounces per ton (or other units) can be calculated. |
|||
Although fire assay processes have been around for many centuries, they are still somewhat of a mystery to many miners. As result, sometimes unscrupulous operators will proclaim that they have developed “secret” assay processes which can find gold, silver, or platinum group metals that no other assay process can detect. While improper fire assay methods or incorrect fluxes can cause problems, when properly done a fire assay is extremely reliable method of determining the gold and silver content of an ore sample. The details of how to do a fire assay correctly, and the proper fluxes and how they are made, have been written about and published in many books. They are not secret in any way. Nearly all of these special “secret” assay processes are eventually proven to be fraud. In addition to the precious metals themselves, the exploration geologist is also interested in a suite of elements that are known as “indicator” or pathfinder elements. These include mercury, arsenic, antimony, thallium and others. Increased levels of these elements may indicate valuable gold or silver deposits nearby. To measure these elements, the sample must be digested and put into a water solution. There are several methods to put the elements into solution, but the most common is to dissolve them in a heated solution of aqua regia acid (aqua regia is a combination of Hydrochloric and Nitric acids). Other acid digestions include one doe with a combination of Hydrofluoric, nitric, Perchloric and a final leach with hydrochloric acid – this is called a”4 acid” process and achieves a near complete digestion of the sample. The resulting leach liquid, no matter the digestion process, is analyzed with special equipment. The instruments used in these analyses measure very small quantities of these indicator elements, and include atomic absorption, x-ray fluorescence, inductively coupled plasma with atomic emission spectroscopy, mass spectroscopy and infrared spectroscopy. |
 |
||
Assay results from a modern lab are not cheap to obtain. Just for comparison sake, recently dropped off seven samples to be analyzed by fire assay for gold and by atomic absorption for suite of pathfinder or indicator elements. The samples cost a bit more than $26 apiece to analyze, and they do want their payment in advance. In addition, because of the high price of gold and silver, and the resulting increase in exploration activity, the processing time for my samples was about four weeks. Turn around times are a lot longer these days as the assay labs are quite busy. |
|||
A new type of test which is been done in recent decades, is the bottle roll test. This is a preliminary test to determine the leach ability of an ore by cyanide. In this type of test, a known quantity of pulverized sample is placed in a bottle with dilute cyanide solution. The bottle is placed on an apparatus that rotates the bottle keeping the sample and cyanide solution mixing together at all times. After certain amount of time, usually 24 hours, the solution is sampled in the amount of gold which contains is determined. Usually a portion of the sample is treated by fire assay as well, so calculations can be made to determine the percentage of gold recovered by the bottle leach process. Similarly, there are also processes where a large diameter plastic pipe is filled with crushed ore material, and cyanide solution is percolated down through a vertical pipe and collected. After certain amount of time circulating the cyanide solution down through the material in the pipe, the solution is tested for its gold and silver content. This process is known as a column leach test. Each of these two cyanide leach tests have their own specific benefits. |
 |
||
A Simple But Accurate Free Gold Field Test You Can Perform The old time prospectors when they were out searching in the field for new veins would do a rough assay by crushing or samples and carefully panning the results. With some experience and a careful examination of the amount of gold present, they could make some excellent visual of the estimates of the amount of free gold in the ore. This method has its limitations, because it is possible to have significant gold which is not free, or too small to be panned and seen by the prospector. Still it was a handy and quick way to estimate the gold content and know quickly if they had struck it rich without having to carry hundreds of samples in to the nearest assay office. |
Recommended Metal Detectors For Gold Prospecting:
|
||
With modern tools, it is possible to make a better estimate of the amount of “free gold” present in an ore. In many ways this is like extracting the gold from high grade specimens, but the difference is in the calculation of values. You'll need a scale capable of weighing a few hundred grams, and the second scale capable of weighing small amounts, preferably one 100th of a carat (a carat is equal to 1/5 of a gram). This second scale needs to be extra accurate – I paid about $40 for my 1/100 carat scale. The first step in this process is to determine the weight of the sample you are going to process. Realistically, your sample should be in the range of no less than 5 pounds up to about 15 pounds. You will need to weigh your sample, and determine it’s weight in grams. This may take a number of steps as you weigh parts of the sample on your scale and add them up until you get the weight of the total sample. The greater the weight of your original sample, the more accurate the results will be, but you will also be doing a lot more work to crush the sample to size. Be sure to write down the exact weight of the sample because you will need this number later. |
 |
||
The next step is to crush and pulverize the sample. There are a number of ways to crush a sample down, and I have a separate web page discussing methods for crushing and pulverizing rock samples and specimens. Take a look at this webpage to get an idea of what methods you might want to use on your sample. You can find it here: Rock Crushing page. You will need to get your sample crushed down to a fine sand and powder size. This is necessary to be sure that you will recover all the gold in the sample. The next step is to carefully pan through your sample. You need to be very watchful about what how you do this to be certain that you do not loose any fine gold. The whole purpose here is to get down through to a final fraction which has nothing but gold. Pan down until you only have about a couple teaspoons of material left. Of course, you can use magnets to help remove magnetite. If you can produce a dry pure gold sample, you can weigh that, but in most cases you’ll need some additional help. Take a small blob of mercury about the size of a small bean, and carefully weigh it on the 1/100th carat scale. The blob should weigh about 15 carats or so (around 3 grams). Be sure to write down the exact weight and then add it to your pan. Shake your pan until all the gold is collected by the mercury. Don't over do it and shake the pan so hard the mercury breaks all up into little pieces. Then remove the mercury and allow it to dry. Re-weigh the dry mercury (which now contains the free gold from your sample). Subtract the original weight of the final weight now containing the gold. This gives the weight of the gold. See my web page on amalgamation to see more information on the hazards and use of mercury to recover gold. You can find it here: Using Mercury page. Once you have the weight of the gold, and you have the weight of the original sample. You can use the following method to determine the weight per ton of gold in the ore. Mass assays: calculating the content Weight of your sample in grams / 908000 grams per ton = weight of your sample in tons. Weight of your sample in carats / 155.5 carats per troy ounce = wt. of your sample in ounces To determine the ounces per ton, do the following: (1 / weight of sample in tons) = Factor Then the weight of the gold in troy ounces x the Factor = ounces gold per ton of rock Now this result does not take into account the purity of the free gold in the sample – and most natural gold does contain some silver and traces of base metals including copper. On the other hand, panning does not recover 100% of the very finest gold, and even with small sand sized material, some gold will be lost in the tailings. The two effects kind of cancel each other out. In any case, it does give you a good feel for how much gold is in the rock. |
|||
| . | |||
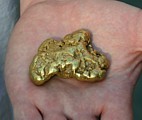
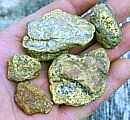
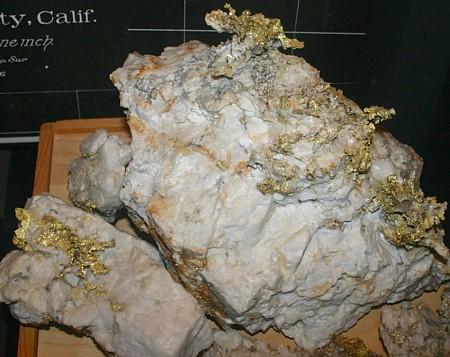
Want to know a little bit more about this crazy prospector guy? Well, here's a little bit more about me, and how I got into prospecting: Chris' Prospecting Story Interested in seeing more gold? Here are some interesting photos of beautiful Gold Nuggets


