Learn To Pan For Gold Nuggets
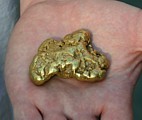
.
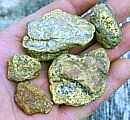
Learn To Pan For Gold Nuggets |
 |
||
|
. |
Interested in panning for gold? You can do it! This is my page of instructions on how you can dig for gold with a pan. The gold pan is a very simple yet handy tool for finding gold. You can carry one around with ease and its often the first piece of prospecting equipment that any prospector purchases. Learning to pan is not very hard - I taught myself after reading a description of the process in a book. With a bit of time and practice, you will learn to quickly concentrate the heavy materials in a gravel sample down to a small amount so you can easily see what amounts of gold may be present. |
 |
|
|
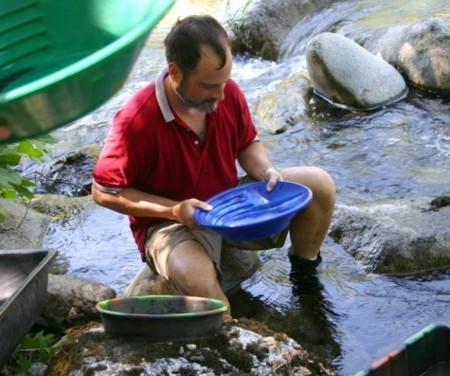
Perhaps the oldest and most widely used gold concentration device is the gold pan - originally called a "gold dish" by the 49ers (and still called a dish by prospectors in Australia). Although pans are available in various shapes and sizes, the standard American gold pan is 12 to 18 inches in diameter at the top and 2 to 2 1/2, inches in depth, with the sides sloping at roughly 30 to 45 degrees. They can be purchased at prospecting stores, rock shops and even some hardware stores for round $8 to $12. Gold pans are constructed of metal or plastic and both are used in prospecting for gold, for cleaning gold-bearing concentrates, and rarely, for hand working of rich, isolated deposits. Plastic pans are recommended for most folks, because they have some significant advantages over the older steel types - including the fact that they are lighter, don't rust, nor do they conflict with the use of a magnet. Around the world miners use a wide variety of containers in place of the pan. In South America, prospectors have long used an open wooden bowl called a betea to process the gravels. In Mongolia, prospectors are currently using large plastic tubs. The exact shape of the device is not all that critical, its point is to allow the operator to shake the gravels so the gold settles downward, and then wash the lighter material off the top. Eventually after all the lighter materials have been removed, only the heavy concentrates will remain in pan, hopefully including gold. |
|
|
|
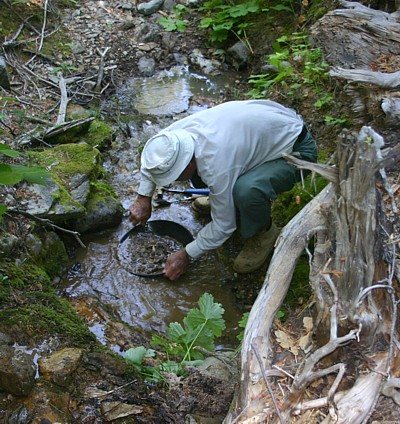
The basic operation of a pan is actually fairly simple, but experience and skill are needed to process large amounts of material and achieve maximum recovery. Panning is best learned by watching an experienced panner work, but the general principles and steps are outlined below. With a little practice, you can learn to pan gold for your self. Just follow the instructions on this website. When you have read this page and think you understand the panning process, do a little practice run and try it for yourself. For your first trial attempts, take a few pieces of small lead buckshot, mix it with some sand and gravel, follow the directions of this article and see if you can pan away the gravel and keep the lead shot in your pan. if you don't have buckshot, cut some lead (real lead metal not pencil lead) into small pieces less than 1/8 th of an inch in size. For maximum recovery, the material to be panned should be as uniform in size as possible - it's a good idea to remove big pebbles and stones larger than about 1 inch from your pan before you even begin. Take care to wash these stones so that the sand and clay attached to them stays in your pan. Some studies have shown that the fines attached to the larger rocks actually contains a lot more fine gold than one would expect. Panning is best done in a tub or pool of still, clear water, a spot where you can get good balance or even sit on a rock. You don't want to lose your balance and slip and fall into the River along with the gold in your pan. the advantage of using a tub, especially if you are new to panning, is that you always have the opportunity to re-pan the material in the tub. |
 |
|
|
|
||
| First, fill the pan one-half to three fourths full of ore or concentrate - be sure to leave some space at the top especially if you are beginning panner. Add water to the pan or carefully hold the pan under water and mix and knead the material by hand, carefully breaking up lumps of clay and washing any rocks present. As much as possible, wash the clay out from the pan. Re-fill the pan with water (if not held underwater) and carefully remove rocks and pebbles, checking them before discarding - occasionally you may find a piece of Quartz laced with gold although I will tell you this is a very rare occurrence in most locations. Tilt the pan slightly away from you and shake with a back-and-forth motion from side to side. You have to do it hard enough that the gravel material shakes and moves around. The point of the shaking is to allow heavy materials to settle and work their way downward toward the bottom of the pan. Gold is extremely dense and heavy - it is actually much heavier than lead - and so as you shake the pan it naturally wants to move downward through that sand. As you shake, the heavys move down, and this leaves the light materials on top. The tilt of your pan should be such that even when shaking back and forth, material does not shake out the pan. | ||
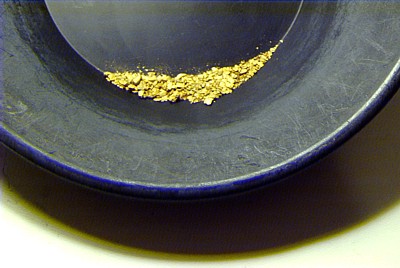
The next step is to wash the light material now on the top layer of your gravel out of the pan. With a gentle forward and back motion while holding it just below the surface of the water, lift the pan and allow a gentle flow of water to wash the light material over the edge of the pan and out of it. Removal of lighter material is facilitated by gently raising and lowering the lip of the pan in and out of the water. After these lighter materials have been washed off the top (typically you have taken off the top quarter inch of material), you will then repeat the process of shaking the pan from side to side with the same type of motion used originally to help concentrate the materials and move the heaviest of the bottom. After a bit of shaking, when the heavies have settled downward, you repeat the second process of watching the lighter material off the top. You have to repeat because gold will not always work its way right down to the bottom of the pan - sometimes it gets stuck along the way down. Large pebbles should be periodically removed by hand as they come to the top or are revealed during the removal of the light materials. As you continue to repeat these steps, the tilt on the pan will slightly increase. Keep on repeating this two-step process of shaking down and then washing off the lighter material and occasionally picking out the pebbles until you've reduced your material down to a couple of tablespoons full, when only the heaviest material remains. Any gold that is present may be observed by gently swirling the concentrate into a crescent in the bottom rim of the pan. Coarse nuggets are removed by hand, while finer grained gold may be carefully picked out with tweezers or all the black sands may be saved for further processing later. If you have a magnet, and a plastic pan, you can use the magnet to pull some of the black sand out of your concentrates |
 |
|
|
An experienced panner can process about one cubic yard yard in 10 hours. However this does not count the time it takes to dig material out of the ground or river, and usually finding the right spot and the process of digging the material out of the ground take a lot longer than the time it takes to actually pan the material. Panning was widely used as a primary recovery method in the early days of mining. Snipers and backpackers still use it in rivers today that are difficult to reach and so it not been heavily worked. However, the process of panning is extremely limited, as only small amounts of gravel can be processed, even by the most experienced panners. Today the gold pan is used mostly for prospecting or for cleaning concentrates. Its low price, immediate availability, and portability make it an essential tool for the individual prospector or miner. |
||
| My instructions here really make panning for
gold sound a lot more complex than it really is, and once you've practiced a
bit with it you will see that panning is pretty easy. You will see that the real
difficult part is not so much in the learning how to operate a pan or any other
type of mining equipment. The difficult part is in finding the gold!
Gravel is every where, but gravel with some good gold nuggets in it is a
whole lot harder to find. There is a lot to be learned as far as how to hunt for gold and how to find
it even when you are in the right regions and locations. I have other
articles on my web page here that talk about digging for gold in the best
places to look you'll want to take a look through these so you can learn to
find gold for yourself. Good luck in your prospecting! I did up a web page on improvising your own gold pan from stuff on hand. Take a look at: Make Your Own Gold Pan |
 |
|
|
|
|
Want to know a little bit more about this crazy prospector guy? Well, here's a little bit more about me, and how I got into prospecting: Chris' Prospecting Story Interested in seeing more gold? Here are some interesting photos of beautiful Gold Nuggets